By Jo Ng, RPSGT, Sleep Technologist | Updated 2025
CPAP therapy transforms sleep quality for millions of users worldwide. However, even the best CPAP machines can present challenges during your treatment journey. Most side effects are completely manageable with simple adjustments.
This comprehensive guide addresses the most common CPAP problems. Moreover, we provide step-by-step solutions for optimizing your pressure settings effectively.
How to Fix the 5 Most Common CPAP Side Effects
1. CPAP Bloating and Stomach Discomfort (Aerophagia)
What Causes CPAP Bloating? Aerophagia occurs when you swallow air from the CPAP pressure. This creates uncomfortable gas buildup in your stomach.
How to Stop CPAP Bloating:
- Lower your pressure gradually: Decrease the minimum pressure in 0.5 or 1.0 steps
- Elevate your head while sleeping: Place sturdy blocks under the head legs of your bed. This creates a gentle incline that prevents air from entering your oesophagus
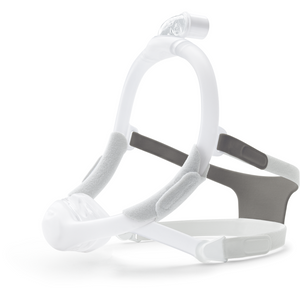
2. CPAP Mask Marks and Skin Irritation
Why Does My CPAP Mask Leave Red Marks? Tight mask straps cause skin soreness and pressure marks. Over-tightening is the number one cause of both leaks and discomfort.
How to Prevent CPAP Mask Marks:
- Loosen your headgear straps: You should fit two fingers comfortably under the straps
- Try a different mask style: If redness persists, explore different CPAP masks designed for your facial structure
3. CPAP Dry Mouth and Nasal Congestion
What Causes CPAP Dry Mouth? Breathing dry, pressurised air creates mouth and throat irritation. Furthermore, mouth leaks make this problem significantly worse.
How to Fix CPAP Dry Mouth:
- Use your humidifier properly: Always use your humidifier and increase the humidity level. Check our CPAP humidifiers for better options
- Add heated tubing: Heated CPAP tubing keeps air moist and warm, preventing irritation
- Stop mouth leaks immediately: Dry mouth indicates your mouth opens during sleep. Use chin straps or medical mouth tape. Read our dry mouth solutions guide for detailed help
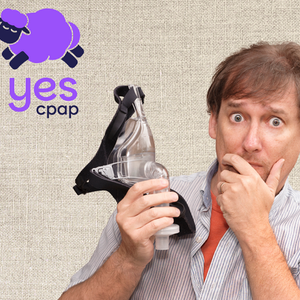
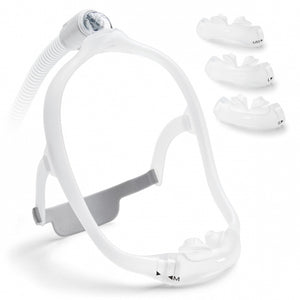
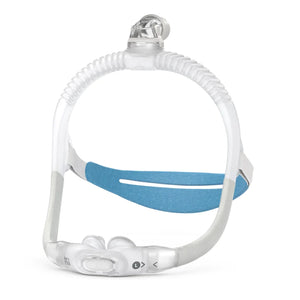
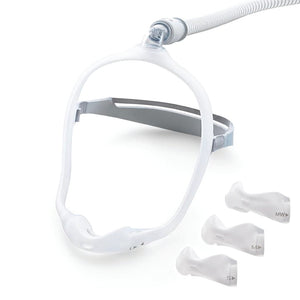
4. CPAP Claustrophobia and Mask Anxiety
Why Do I Feel Claustrophobic with CPAP? Bulky full-face masks create feelings of confinement and anxiety for many users.
How to Reduce CPAP Claustrophobia:
- Switch to minimal-contact masks: Try nasal pillow masks instead of full-face options
- Practice daytime wear: Wear your mask while watching TV to build comfort gradually
5. CPAP Breathing Difficulties
Hard to Exhale with CPAP? High-pressure settings make exhaling feel difficult and unnatural.
Solution for CPAP Exhale Problems:
- Decrease your minimum pressure setting
- Consider upgrading to BiPAP: BiPAP machines provide lower exhale pressure, making breathing feel more natural.
Frequently Asked CPAP Questions and Answers
Q: Why Do I Feel Short of Breath on CPAP?
A: "Air hunger" typically means your minimum pressure is too low. Therefore, increase your Auto Min or EPAP Min setting by +1. Our air hunger troubleshooting guide provides additional solutions.
Q: Is My CPAP Mask Broken? Air Blows from Small Holes
A: Those holes are CO2 exhalation ports, not defects. In fact, they're critical safety features that wash out carbon dioxide from your mask. Learn more in our mask venting explanation guide.
Q: How Often Should I Replace CPAP Equipment?
A: Replace masks every 3-6 months and filters monthly. However, replacement frequency depends on usage and care habits.
Professional CPAP Pressure Optimisation
Most doctors set machines to wide pressure ranges (4-20) and leave them unchanged. However, this approach is suboptimal for achieving the best results.
Important Disclaimer: Always consult your doctor before making pressure changes. This guide serves educational purposes only.
Step 1: Access Your CPAP Settings
How to Unlock Provider Menus: Search YouTube for "[Your Machine Brand/Model] provider menu" tutorials. Most machines have hidden settings accessible through button combinations.
Step 2: Set Initial Pressure Parameters
For Auto-CPAP Beginners:
- Set Auto Min to 4, Auto Max to 12
- Choose auto CPAP devices for automatic pressure adjustment
For Auto-BiPAP Users:
- Set EPAP Min to 4, IPAP Max to 12
- Use Pressure Support (PS) of 2 or 3 initially
Daily Data Monitoring: Check AHI, leaks, and P95 readings every morning. Our CPAP data interpretation guide explains these numbers in detail.
Step 3: The 7-Day Optimisation Process
Important Rule: Adjust only one setting per night for accurate results.
Day 1-2: Fix Leaks First. Address all mask leaks before adjusting pressure. Read our CPAP leak fixing guide for specific solutions.
Day 3-4: Adjust Maximum Pressure. If P95 pressure reaches your Auto Max or IPAP Max, increase the maximum by +2.
Day 5-6: Target Obstructive Apneas
- If OAI exceeds 1.0, increase Auto Min or EPAP Min by +1
- If OAI exceeds 5.0, increase by +2 instead
- Continue until OAI stays at or below 1.0 consistently
Day 7: Address Hypopneas and RERAs. Once obstructive apneas are controlled, increase Auto Min or PS if HI remains high.
Ongoing Monitoring: Watch Central Apneas. If CAI rises above 2.0-3.0, your pressure may be too high. Learn about treatment-emergent central apnea management strategies.
Key Takeaways for CPAP Success
Following this systematic approach for 7-14 days helps you achieve truly effective therapy. Moreover, proper optimisation leads to better sleep quality and improved daytime energy.
For additional resources and troubleshooting tips, visit our CPAP care blog. We regularly publish new guides to help you succeed with CPAP therapy.
Remember: CPAP therapy success requires patience and fine-tuning. However, the health benefits of treating sleep apnea make this effort worthwhile.